
Gibson Custom Shop
Setup Tips
It’s your guitar; don’t be afraid to work on it.
The Gibson Custom Shop builds the finest electric guitars ever made. Whether painstakingly recreating the sought-after classics of the late 50s and early 60s with the incredible VINTAGE ORIGINAL SPEC series, or enhancing time-honored traditions to an artist's wishes with the INSPIRED BY models, the luthiers of Gibson Custom have elevated guitar building to both a science and an art. It is a labor-intensive, hands-on process from start to finish, and each guitar brings with it special requirements and demands. They all have something in common, though: Before a guitar can leave the Custom Shop, it is meticulously set up to play beautifully.
Here, for the first time, is an intensive breakdown of a Gibson Custom Shop setup process. Many players don't realize that a guitar is a precision instrument. Change in season, temperature, humidity, and even playing style can radically change a guitar's playability. While a guitar store or guitar repairman can set up your guitar for you, this will cost you anywhere from $25 to over $100. Also, much of a setup is based on your own personal preferences. Nobody can know your guitar like you do, and doing your own setups will allow you to know your guitar even better. The luthiers of the Gibson Custom Shop recommend setting up your guitar at least twice a year, more if you live somewhere with strong climate changes.
A setup is a simple process once you get the hang of it. Work slowly and consult the pictures. Note that extreme care must be taken when tightening the truss rod. This is one of the few things you can do during a setup that can actually ruin your guitar. Remember, your guitar is a precision instrument. All the steps of the setup are designed to be performed slowly and gently. The results will be improved sound and playability, and a closer relationship with your instrument.
YOU WILL NEED:
| 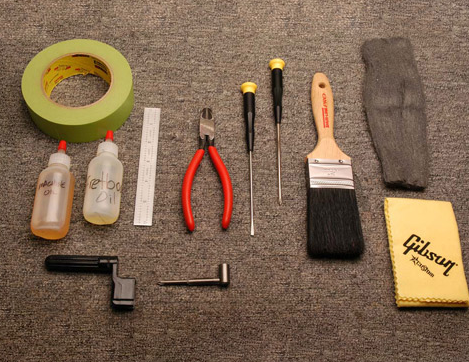 |
|
STEP 1 STEP 2 Note: If you are steel wooling the frets on a maple board, cover the fretboard with masking tape to protect it from scratches. | 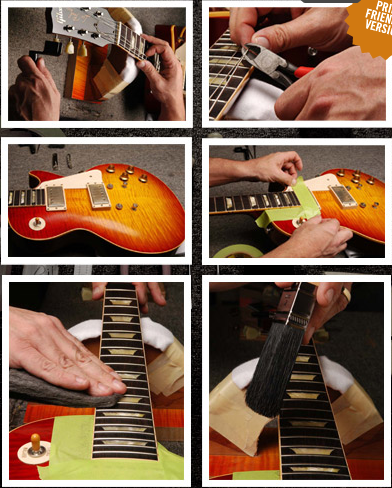 |
|
STEP 3 STEP 4 STEP 5 | 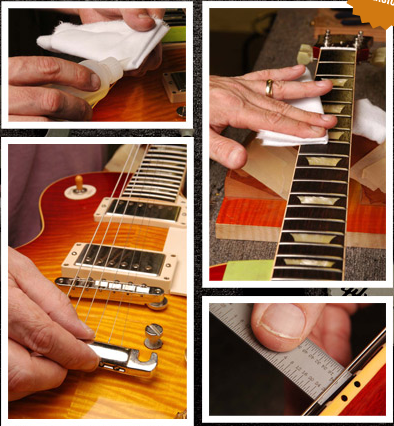 |
|
STEP 6 | 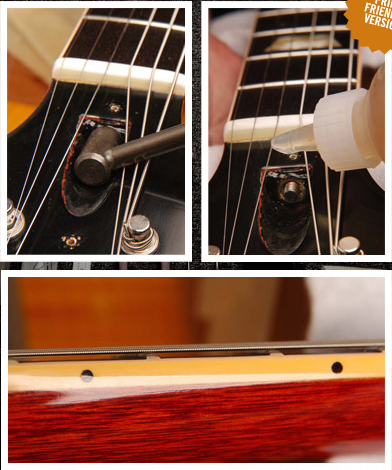 |
|
STEP 7 STEP 8 Set intonation screws on the bridge. To rough in the intonation, center the low E and high E saddles to the post holes in the bridge. The A string will be 2/32” closer to the nut than the low E and the D string will be 2/32” closer to the nut than the A. The B string will be 2/32” closer to the bridge than the high E and the G string will be 2/32” closer to the bride than the B string. These measurements will get you in the ball park. Intonation will vary with instruments and string gauges. | 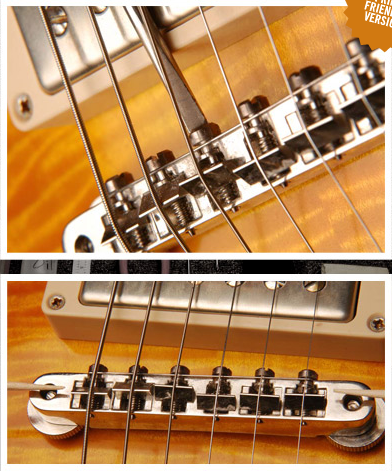 |
|
STEP 9 Final intonation. Adjust in playing position! Plugged into a tuner, sound the string open and then fret the string at the 12th fret. The note should be exactly one octave higher when fretted. If the note is sharp at the 12th fret, adjust the saddle so it is closer to the tailpiece. If it is flat, adjust the saddle to be closer to the nut. STEP 10 Set pickup height. Fret on the last fret of the guitar. Pole pieces should be 3/64” from the bottom of the string. | 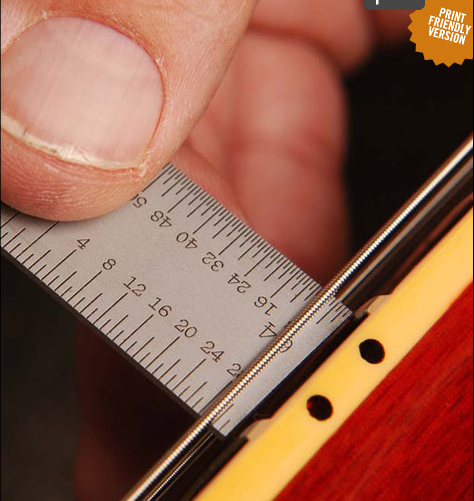 |
|
STEP 11 | 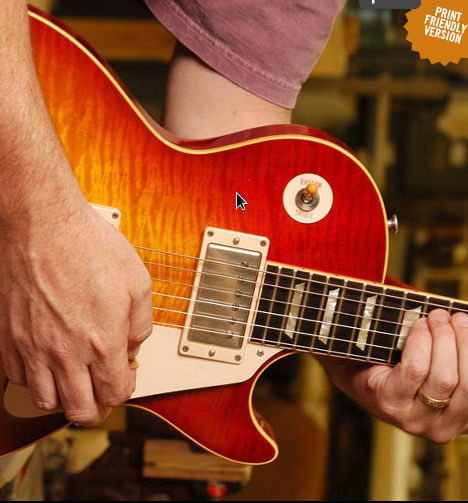 |